


Top Secret Recipes Step-by-Step: Secret Formulas with Photos for Duplicating Your Favorite Famous Foods at Home: A Cookbook
304


Top Secret Recipes Step-by-Step: Secret Formulas with Photos for Duplicating Your Favorite Famous Foods at Home: A Cookbook
304Paperback
-
PICK UP IN STORECheck Availability at Nearby Stores
Available within 2 business hours
Related collections and offers
Overview
A full-color cookbook from America's Clone Recipe King
For more than twenty-five years, Todd Wilbur has been obsessed with recreating America's most iconic brand-name foods at home. In his first cookbook with color photos, the New York Times bestselling author brings you 125 new clone recipes: 75 first-time hacks and 50 overhauled all-time favorites. Each recipe comes with easy-to-follow step-by-step photos so that even novice cooks can perfectly recreate their favorite famous foods with everyday ingredients. And your homemade versions cost just a fraction of what the restaurants charge! The result of years of careful research, trial-and-error, and a little creative reverse-engineering, Top Secret Recipes® Step-by-Step hacks:
• KFC® Original Recipe® Fried Chicken and Cole Slaw
• Cinnabon® Classic Cinnamon Roll
• IKEA® Swedish Meatballs
• Pinkberry® Original Frozen Yogurt
• Raising Cane's® Chicken Fingers and Sauce
• Arby's® Curly Fries
• Lofthouse® Frosted Cookies
• Wendy's® Chili
• Panera Bread® Fuji Apple Chicken Salad
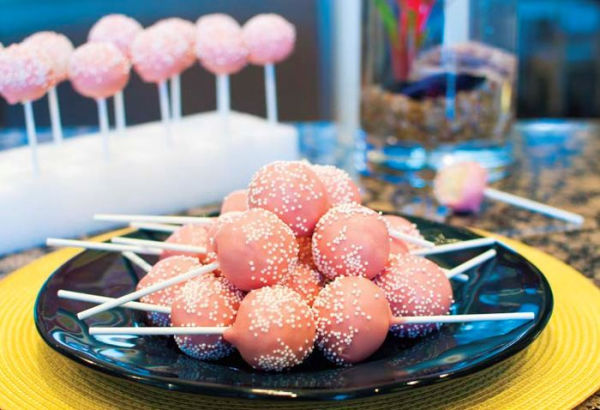
• Starbucks® Cake Pops
• Cafe Rio® Sweet Pork Barbacoa
• McDonald's® McRib® Sandwich
• The Melting Pot® Cheddar Cheese Fondue
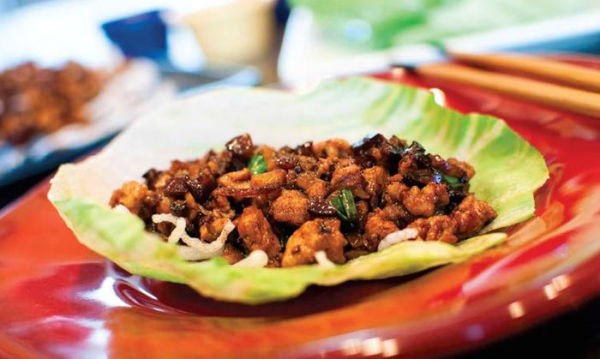
• P.F. Chang's® Chicken Lettuce Wraps
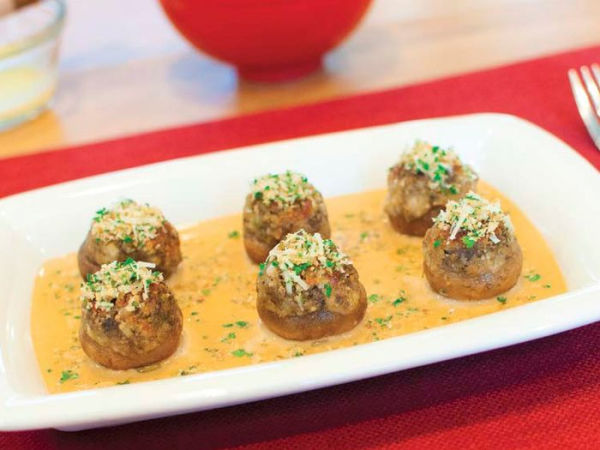
• The Cheesecake Factory® Stuffed Mushrooms
• Ben & Jerry's® Chocolate Chip Cookie Dough Ice Cream
• Chick-fil-A® Chicken Sandwich
• Chili's® Baby Back Ribs
• Chipotle Mexican Grill® Adobo-Marinated Grilled Chicken & Steak
• Cracker Barrel® Hash Brown Casserole
• Mrs. Fields® Chocolate Chip Cookies
• Ruth's Chris Steakhouse® Sweet Potato Casserole
And over 100 more delicious dishes, from snacks and appetizers to entrees and desserts!

Product Details
| ISBN-13: | 9780142196960 |
|---|---|
| Publisher: | Penguin Publishing Group |
| Publication date: | 11/17/2015 |
| Pages: | 304 |
| Sales rank: | 308,815 |
| Product dimensions: | 7.30(w) x 9.10(h) x 0.70(d) |
| Age Range: | 18 Years |
About the Author
Read an Excerpt
THANKS
INTRODUCTION
The first title I gave this book when I started writing it more than three years ago was Joy of Cloning. Not because I was scheming to pick up new readers who stumbled upon my cookbook while searching for Irma S. Rombauer’s Joy of Cooking—although I admit that wouldn’t have been such a terrible thing—but really because, as Rombauer imparted in her culinary classic, the process of entertaining and creating delicious food for friends and family is a true joy. And I think that sentiment pertains as much, if not more, to this niche of cooking. There are practical reasons why we clone famous foods, which I will explore later in more detail, such as saving money and duplicating the taste of our favorite dishes with ingredients that we prefer. But the enjoyment we experience when everyone is amazed by the successful re-creation of a delicious dish they thought they could only get in a restaurant or in a package sets this type of cooking apart from any other.
Over time, as this book evolved from a cookbook with dozens of photographs into one with hundreds of photographs detailing each important step of every recipe, the current title, Step-by-Step, made more sense.
A NEW LOOK WITH PHOTOS
I considered using photographs when I began writing my first Top Secret Recipes cookbook in 1987. I studied photography in college—even took second place in an L.A. Times photography contest with ten thousand entries while I was in school—but at that time I only knew how to process black-and-white photos in the darkroom, and digital cameras were not yet the norm. I wanted to use some art that I could make myself so I decided to illustrate the books with hand-drawn blueprint-style schematics that nicely suited the “top secret” theme of the books. Over a period of twenty-five years, working on a tiny worn-out drafting table using a combination of stenciling and freehand drawing, I inked a total of 450 blueprints to illustrate the first ten Top Secret Recipes cookbooks. As the years moved on I heard from an increasing number of cookbook buyers and TSR fans who expressed a strong desire for photographs in the cookbooks. I decided it was time to leave the blueprints behind and begin a new look for the Top Secret Recipes cookbooks with step-by-step color photos for each of the recipes.
This is the first copycat recipes cookbook that guides you with photographs through every important step of the replicating process for each of the brand-name clone dishes. By using the photos along with the instructions, you will now have a clearer understanding of how each part of each recipe is made, virtually guaranteeing that all of these famous dishes come out as intended, so that you will produce delicious and accurate copies of the popular brand-name foods that everyone loves to eat.
I kept the photos simple and shot many from a first-person perspective, helping you to see exactly how the cooking process should progress in front of you. Since I work alone, it’s a little tricky to pose, focus, and shoot this way, but I dig the angle so it’s worth the extra effort. When the last ingredient was added, I had shot more than 35,000 photos to get the 1,100+ pics that made it into the book.
WHAT’S IN STEP-BY-STEP
All 125 recipes in this cookbook are new, never-before-published recipes. Most of them (a total of 75) are formulas that I have not cloned in any of my cookbooks. I call them “First-Time Hacks.” I chose these recipes from a long list of fan requests that I have compiled over many years and from researching what is popular in today’s food business. Some of these items have been big sellers for many years like McDonald’s McRib Sandwich (here), The Cheesecake Factory Stuffed Mushrooms (here), Carrabba’s Italian Grill Steamed Mussels (here), Gatorade Orange Sports Drink (here), Ben & Jerry’s Chocolate Chip Cookie Dough Ice Cream (here), and Legal Sea Foods Legal’s Signature Crab Cakes (here). Some of the First-Time Hacks you’ll find here are top-selling newer items like Chili’s Chipotle Chicken Flatbread (here), McDonald’s Premium Sweet Chili Chicken McWrap (here), and Wendy’s Pretzel Bacon Cheeseburger (here).
The other fifty recipes in the book are what I call “Improved Hacks.” These are some of my most popular classic clone recipes that I have gone back and re-hacked to make much better than my original previously published versions. I tapped into some new techniques and tricks that I’ve picked up over the last two and a half decades of cloning foods to make these classic recipes even better culinary carbon copies of their famous brand-name counterparts. For these improved hacks I chose my most popular recipes for which I had discovered new information that helps makes the recipes better, or recipes that needed an update because the original product formulas they clone had been altered. If you like my early version of KFC Cole Slaw, then you’ll really like the new hack here where dairy is no longer in the ingredients list. If you’re a fan of the Tony Roma’s Ribs recipe I published almost twenty years ago, then you’re going to be crazy about the new version in this book, which incorporates a restaurant trick I learned to make smoky ribs at home without a smoker (here). The Olive Garden Salad Dressing (here) is better now, as is Wendy’s Chili (here), Applebee’s Fiesta Lime Chicken (here), and El Pollo Loco Fire-Grilled Chicken (here), just to name a few.
To make it clear which of the two categories a recipe falls under I have tagged each one with either “First-Time Hack” or “Improved Hack.”
Eight of the recipes included here (some are Improved Hacks and some are First-Time Hacks) were developed from information I gathered on the eight episodes of my CMT TV show Top Secret Recipe. In the show I travel around the country in my food lab on wheels to the headquarters of some of the country’s biggest food companies and attempt to re-create their famous products. I am given three days to gather enough information—using whatever sneaky means I can muster—to re-create a dish that can fool three judges in a blind taste test. Sometimes I am successful, sometimes not so much. Three days is not a lot of time to hack dishes that were developed and perfected by these companies over years of research and development, so the task is a challenging one—especially when the judges are often picked by the company whose product I’m hacking.
Every recipe from the show is here: Cinnabon Classic Cinnamon Roll (here), Chili’s Grilled Baby Back Ribs (here), Dippin’ Dots Banana Split Ice Cream (here), Domino’s Large Cheese Pizza (here), KFC Original Recipe Fried Chicken (here), Mrs. Fields Chocolate Chip Cookies (here), Outback Steakhouse Bloomin’ Onion (here), and P.F. Chang’s Chicken Lettuce Wraps (here).
BETTER RECIPES, BETTER RESULTS
With this book I have made a few changes to the way I write recipes. These tweaks should help give you more consistent and reliable results that closely match the finished products I intend for you to create.
Because weight is often a more accurate way to measure certain ingredients like flour and powdered sugar, I specify weight measurements for ingredients that are best measured that way. I recommend that you get yourself a kitchen scale and measure ingredients by weight whenever possible. This measuring method will give you more consistent results, especially when baking. If you don’t have a kitchen scale, don’t worry. I also list the volume measurements for those ingredients.
Because the amount of salt in salted butter can vary from brand to brand, I am now creating all recipes with unsalted butter. This small change will help give you results that are closer to mine.
In previous Top Secret Recipes books I often use ingredient shortcuts to make the recipes easy, but this sometimes results in a finished product that could have tasted better if I had used a scratch method. For example, my previous version of Chili’s Molten Chocolate Cake (here) called for a boxed cake mix for the cake and bottled fudge for the molten center. In this book I have redesigned the recipe by making the chocolate cake and fudge filling from scratch. It takes a little more time to write recipes this way, but by creating scratch versions of these formulas I can make adjustments in individual ingredients so that the finished product is a better clone of the original recipe. There are several other re-hacks in this book that I have converted to scratch recipes to give you improved results: the Hostess Twinkie (here), which formerly called for a box of pound cake mix, and the Red Lobster Cheddar Bay Biscuits (here), which called for Bisquick baking mix, are a couple other examples. I have also made an effort to create most of the First-Time Hacks in this book with scratch ingredients for more accurate and great-tasting clone recipes.
I have included an info box at the top of each recipe to give you an idea of the time required for each recipe and the difficulty level. I estimated the time required for the active and inactive preparation of each recipe. The “Active Prep” time is the hands-on time required to make the recipe, while the “Inactive Prep” time is the passive time required to make the recipe, such as when ingredients are marinating or something is baking.
In addition, I have estimated the difficulty of each recipe by tagging the recipe with either “Easy,” “Medium,” or “Hard.” If you are a novice cook I suggest you use only the recipes that are either “Easy” or “Medium” difficulty. These recipes make up the bulk of the recipes in this book. There are, however, a handful of recipes here that I consider to be “Hard.” A little more cooking experience is suggested for these recipes and the time required to make these recipes is considerably longer. You up for the challenge? Don’t be scared. They’re not impossible recipes—just a little harder than the other ones.
WHY CLONE FAMOUS FOODS?
It was in 1987 that I received a chain letter in the mail claiming to be the real secret recipe for a Mrs. Fields Chocolate Chip Cookie. It was not, of course. But this chain letter with a mediocre recipe for chocolate chip cookies printed on it was widely popular across the country and caused quite a stir. People who made the recipe and had never tried a Mrs. Fields Cookie assumed that Mrs. Fields Cookies were as ordinary as the cookies produced with the recipe. The chain letter also claimed that the recipe was obtained by a woman who had purchased it at one of the cookie stores for $2.50 but was then charged $250.00 on her credit card for the purchase. This prompted the Mrs. Fields Cookie company to place signs in all their stores disclaiming the recipe as well as the story about the woman’s purchase and overcharging. Debbi Fields later wrote about the incident in her book, One Smart Cookie, referring to the situation as “The Recipe Problem.”
When I saw the signs pop up in the cookie stores, it struck me that this ridiculous little chain letter must have become very popular—and it didn’t even make a good cookie! It became obvious to me that America had a fascination with copycat recipes for famous brand-name foods, and a book filled with a bunch of recipes like these might be a winner. For the next five years I spent all my free time learning how to reverse-engineer popular foods, and I started by making a much better version of the Mrs. Fields Chocolate Chip Cookie than the one in the chain letter. Eventually I had created a collection of recipes that duplicated the taste and appearance of iconic American brand-name foods, and I set out to find a publisher for the book.
That first book, called Top Secret Recipes, came out in 1993 and sold better than expected. I appeared on several popular TV and radio talk shows in the following weeks responding to various questions about my food-hacking process, my favorite cloned recipes, and which secret formulas were the most difficult to reverse-engineer.
One of the questions that I got most often back then—and still today—is, “Why would anyone want to duplicate a famous food item that they can just go out and buy?” In a short radio or TV interview it’s hard to hit on all of the reasons why America loves to clone food and why this specialty niche of cooking is more popular today than ever before, but this is the perfect place to give you my full list:
Cost: It is almost always cheaper to clone these food items at home than it is to purchase the original items at restaurants or in stores. Through cost analysis I have found that re-creating these dishes in your own kitchen costs an average of around half of what the original product will cost you. Cloning famous food at home is a great way to save some coin.
Customization: With these recipes you have the freedom to customize brand-name dishes to suit your taste preferences and nutritional needs. You may wish to substitute reduced-fat ingredients for those with full fat, such as mayonnaise or sour cream. You may prefer to use organic ingredients, or use wheat buns when sesame seed buns are called for. You may choose to substitute ground turkey for ground beef because you don’t eat red meat. You now have the freedom to make these dishes the way you like them and treat yourself to a special version of the item that is not available where the original is sold.
Discontinuation: Someone once said to me, “Why would I ever want to make a Twinkie at home when I can just go out and buy a Twinkie? It’s not like they’re ever gonna stop selling Twinkies!” But in November 2012, that’s exactly what happened. Due to a labor dispute, Hostess closed the doors to its baking facilities and we became a Twinkie-less country until the company reopened with new owners in July of the following year. There are gobs of other famous foods that have been discontinued over the years, many of them indefinitely. Having these secret recipes is the only way to enjoy the taste of our favorites long after they are gone.
Scarcity: In the holiday months of 2008 a memo was sent to all Starbucks stores announcing a shortage of the Pumpkin Cream Cheese Muffins. Demand was so high that year that supplies were dwindling and the chain would run out before the holidays had even arrived! In November 2009 historic amounts of rain closed the plant in Atlanta that makes Eggo Waffles and another Kellogg’s plant in Rossville, Tennessee, was closed indefinitely for repairs. These two closures reduced Eggo production by 50 percent and the country was faced with a nationwide shortage of Eggos that left grocery store freezer shelves empty for weeks. With clone recipes at the ready for popular items such as these (both of which I previously cloned in another book and on our website at TopSecretRecipes.com), scarcity of your favorite food products is no longer an issue.
Location: When you were in Indianapolis you had the best shrimp cocktail of your life at St. Elmo Steak House and now you’re back home in Poughkeepsie with a deep craving for it. Good thing you have a clone recipe for St. Elmo Steak House World Famous Shrimp Cocktail here to satisfy your otherwise insatiable urge, so that you can treat yourself to a food that’s only available in a specific part of the country. It’s also nice to have a handy clone recipe for the famous Hashbrown Casserole from Cracker Barrel (here) when the closest Cracker Barrel Restaurant to your house is a six-hour drive away. And it’s pouring rain.
Mixed-up Menu: You want to make a meal with an appetizer of Loaded Potato Skins from T.G.I. Friday’s (here), Chili’s Grilled Baby Back Ribs (here) as the entrée with some Marie Callender’s Famous Golden Cornbread (here) on the side, and Applebee’s Maple Butter Blondie (here) for dessert. This would be an impossible meal to get at any one restaurant and you’re not about to drive around town picking everything up. Using the recipes in this book, you have the unique ability to assemble amazing feasts that feature a combination of your favorite signature dishes from a variety of different restaurants.
Fun and Adulation: Cloning famous foods at home is fun. When you decide to make something to eat at home to serve to your friends and family, why not make something you love from your favorite restaurant chain? It’s an entertaining culinary challenge and an engaging experience to find out if you are successful. And when you are, it’s always nice to hear the words of amazement. This is the joy of cloning that I write about at the beginning of this introduction. There’s no other niche of cooking that offers the same culinary experience. You are in for a treat.
THE JOY OF CLONING
On my end, creating these clones of famous food is about the challenge of it, solving the puzzle, discovering the secrets—knowing that I was successful at re-creating the familiar flavors we love. Hearing great comments from fans and seeing all the positive reviews for my recipe creations over the years is my reward. My joy begins before the clones are complete, during the creation of the recipes, even as frustrating and tedious as the task can be at times. My pleasure comes from the process, especially when it yields a great result. My joy is in the hacking—the snooping, the exploring, and the experimenting, and knowing that the pure pleasure I get from my work will translate into beautiful and delicious dishes in your home unlike those you have made from any other cookbook.
I am certain that you will have many great times in your kitchen with this book. And I hope that later on down the road you will come back for another joy-filled helping.
To all my friends—happy cloning!
APPLEBEE’S MOZZARELLA STICKS
First-Time Hack
Active Prep: 20 min.
Inactive Prep: 3 hrs.
Difficulty: Easy
Yield: 12 sticks
I realized that I had never assembled a hack of the great mozzarella sticks from America’s largest casual restaurant chain when I was working up a lower-fat version of this recipe for The Dr. Oz Show (you can get that recipe at TopSecretRecipes.com). Mission finally accomplished. Now you can make your own delicious and easy culinary carbon copy of Applebee’s popular finger-food appetizer that the Huffington Post claims is one of the best in the biz.
½ cup plain bread crumbs (such as Progresso brand)
1 tablespoon grated Parmesan cheese
¾ teaspoon Italian seasoning herb blend
¼ teaspoon plus ⅛ teaspoon salt
¼ teaspoon garlic powder
2 large eggs, beaten
1 cup whole milk
½ cup all-purpose flour
12 1-ounce mozzarella cheese sticks
6 to 12 cups vegetable oil
ON THE SIDE (FOR DIPPING)
½ cup marinara sauce
Combine the bread crumbs with the Parmesan cheese, Italian seasoning, salt, and garlic powder in a medium bowl. Combine the beaten eggs with the milk in another medium bowl. Pour the flour onto a plate.
Working one at a time, dip a cheese stick into the egg/milk mixture, then coat it with flour. Let it sit in the flour for a bit so that the flour sticks. Dip the floured cheese stick back into the egg/milk mixture, then coat it with the seasoned bread crumbs. Arrange the breaded cheese sticks on a wax paper–lined baking sheet and place them in your freezer for 3 hours.
Preheat the oil in a deep fryer or large saucepan with a thermometer attached to 350 degrees F.
Fry the frozen cheese sticks 3 or 4 at a time in the hot oil for 1½ to 2 minutes or until they are light brown and you see cheese beginning to ooze out. Drain on a rack or paper towel–lined plate. Serve the mozzarella sticks with warmed marinara sauce on the side for dipping.
APPLEBEE’S ORIENTAL CHICKEN SALAD
Improved Hack
Prep Time: 30 min.
Difficulty: Medium
Yield: 2 large salads (Can split to serve 4)
This classic signature salad was a popular staple on Applebee’s menu way before I first cloned it back in 1997. With Applebee’s still going strong some eighteen years later, it’s about time I share a new version of the recipe with some tweaks that make an already good clone recipe even better. The improved sweet-and-sour Asian dressing formula here yields a finished product that tastes much more like Applebee’s current offering, and the breaded chicken is even more like the real deal.
This new recipe produces two giant entrée-size salads that can easily be split up to feed a hungry tribe of four. And if you want to make this fairly simple recipe even easier, you can use frozen pre-breaded chicken fingers and bake or fry them to top your salads. These days Applebee’s also offers this salad with the option of grilled chicken on top, so I have included a marinade and quick instructions for that variation in the Tidbits at the end.
DRESSING
½ cup mayonnaise
3 tablespoons honey
5 teaspoons rice wine vinegar
1 tablespoon lime juice
1 tablespoon Grey Poupon Dijon mustard
1 teaspoon granulated sugar
½ teaspoon sesame oil
CHICKEN
2 skinless chicken breast fillets
1 cup all-purpose flour
2 teaspoons salt
1 teaspoon granulated sugar
¾ teaspoon ground black pepper
½ teaspoon garlic powder
½ teaspoon onion powder
1 large egg, beaten
1 cup milk
4 to 6 cups vegetable oil
SALAD
6 cups coarsely chopped romaine lettuce
2 cups sliced napa cabbage
1 cup thinly sliced red cabbage
½ cup julienned or shredded carrot
¼ cup chopped green onion (green part only)
¼ cup sliced almonds
¾ cup crispy chow mein noodles
Whisk together the dressing ingredients in a small bowl. Cover and chill the dressing until it’s needed.
Cover the chicken breasts with plastic wrap and pound them with a kitchen mallet to about ¼ inch thick. Slice the breasts in half lengthwise to make four long fillets.
Mix together the flour, salt, sugar, pepper, garlic powder, and onion powder in a shallow bowl or a pie pan. Whisk together the egg and milk in another shallow bowl or pie pan.
Working with one fillet at a time, first coat the chicken with the dry breading, then dip it into the egg/milk mixture. Coat the fillet with breading again, then dip it back into the liquid and once again in the breading until well-coated. Arrange the breaded fillets on a plate until the oil is hot.
Fill a sauté pan with oil to about an inch deep. Heat the oil to 325 degrees F.
When the oil is up to temperature, fry the breaded chicken for 5 to 7 minutes or until golden brown. Drain on a rack or paper towel–lined plate.
Build the salad by tossing together the romaine lettuce, cabbages, and carrot.
Divide the salad onto two plates and sprinkle each with green onion. Sprinkle the sliced almonds over each salad, followed by the chow mein noodles.
Slice the chicken into bite-size chunks and arrange it on the top of each salad. Serve your salads with the dressing on the side.
If you would like to use grilled chicken rather than breaded fried chicken on your salad, combine 3 cups water, 1 tablespoon salt, ½ teaspoon garlic powder, and ¼ teaspoon hickory-flavored liquid smoke. Pound 2 skinless chicken breast fillets flat and marinate in the brine solution for 3 hours. When done marinating, blot each chicken breast dry, rub with oil, and grill (on a barbecue or indoor grill pan) until done. Lightly pepper each fillet while grilling. Slice the chicken into bite-size chunks and arrange it over the top of each salad prepared as in the above recipe.
You can also use pre-grilled frozen chicken breasts prepared as instructed on the package.
APPLEBEE’S MEXICAN RICE
First-Time Hack
Active Prep: 5 min.
Inactive Prep: 30 min.
Difficulty: Easy
Yield: 4 servings
Here’s an easy side dish that can be served with just about any entrée but is especially great with the clone recipe for Applebee’s Fiesta Lime Chicken here. Be sure you are using converted rice for this recipe, not instant rice. And if you can’t find poblano or red Fresno peppers, any mild red and green peppers will do the job.
1 tablespoon olive oil
1 cup uncooked converted rice
1 cup water
1 cup chicken broth
¼ cup frozen yellow corn
1 tablespoon minced poblano pepper
1 tablespoon minced red Fresno pepper
1½ teaspoons chili powder
¾ teaspoon salt
1 teaspoon lime juice
Heat up the olive oil in a medium saucepan over medium heat. When the oil is hot, add the rice and stir constantly until the rice begins to turn light brown, about 3 minutes.
Add the remaining ingredients except for the lime juice and bring the mixture to a boil, then reduce the heat to low and cover the pan. Cook for 30 minutes or until the rice has absorbed all of the liquid. Turn off the heat and stir in the lime juice.
APPLEBEE’S FIESTA LIME CHICKEN
Improved Hack
Active Prep: 30 min.
Inactive Prep: 1 hr.
Difficulty: Medium
Yield: 4 servings
When I first cloned this dish in 2007 it was called Tequila Lime Chicken. Was the tequila removed from the recipe and the name to satisfy concerned teetotaling Applebee’s customers? I really don’t know. What I do know, however, is that this dish is still one of the chain’s best sellers.
Upon examining the dish at the restaurant recently I discovered that the chicken is brushed with a zesty lime sauce before the Mexi-ranch sauce is applied. I’m not sure if the restaurant’s version of the dish has always included this step, but I do know that my first version of the recipe did not, so it was my responsibility and resolute duty, as a dedicated food hacker, to instantly get cracking on an improved hack of this fine dish. The zesty lime sauce clone is here now, as are improvements for the Mexi-ranch sauce and chicken marinade. At the restaurant, the dish is served with a side of delicious Mexican rice. If you’d like to do the same, you’ll find a new clone of that simple recipe here.
ZESTY LIME SAUCE
2 tablespoons vegetable oil
1 tablespoon white vinegar
2 teaspoons lime juice
½ teaspoon Grey Poupon Dijon mustard
½ teaspoon minced garlic
½ teaspoon granulated sugar
¼ teaspoon ground black pepper
⅛ teaspoon salt
⅛ teaspoon dried oregano
⅛ teaspoon dried thyme
Pinch of crushed red pepper flakes
MEXI-RANCH SAUCE
⅔ cup mayonnaise
⅓ cup sour cream
3 tablespoons whole milk
2 tablespoons diced Roma tomato
2 tablespoons diced onion
1 tablespoon white vinegar
1 tablespoon finely minced cilantro
1 teaspoon paprika
¼ teaspoon ground cayenne pepper
¼ teaspoon garlic powder
⅛ teaspoon salt
⅛ teaspoon ground black pepper
⅛ teaspoon dried dill weed
⅛ teaspoon ground cumin
PICO DE GALLO
1 cup diced Roma tomatoes (about 2 tomatoes)
¼ cup diced red onion
2 tablespoons finely minced cilantro
1 teaspoon lime juice
⅛ teaspoon salt
⅛ teaspoon ground cayenne pepper
CHICKEN MARINADE
3 cups water
½ cup vegetable oil
1 tablespoon salt
1½ teaspoons granulated sugar
½ teaspoon garlic powder
½ teaspoon paprika
½ teaspoon ground black pepper
¼ teaspoon hickory liquid smoke
4 skinless chicken breast fillets
1⅓ cups shredded cheddar/Jack cheese blend
GARNISH
Fried tortilla strips
4 lime wedges
Combine all of the ingredients for the zesty lime sauce in a medium bowl. Whisk well, then set aside.
Combine all of the ingredients for the Mexi-ranch sauce in a medium bowl. Cover and set this aside as well.
Combine all of the ingredients for the pico de gallo, then cover and set it aside along with the two sauces.
Prepare the chicken marinade by combining all of the ingredients in a large bowl. Pound the chicken breasts flat under a piece of plastic wrap with a kitchen mallet. Add the chicken to the marinade, then cover and chill it for 1 hour.
Preheat your barbecue grill to high about 30 minutes before the chicken is done marinating (you can also use a grill pan that is preheated over medium heat). When the chicken has marinated for 1 hour, remove it from the marinade and place it directly on a well-lubricated grill. Cook the chicken for 3 to 5 minutes per side or until done.
Assemble each dish by placing a chicken breast on a plate. Brush a little zesty lime sauce over the chicken, then spoon on some of the Mexi-ranch sauce. Sprinkle about ⅓ cup of cheese over the top of the chicken, then microwave it for 30 to 60 seconds on high heat to melt the cheese.
To serve, arrange the chicken breast on top of a bed of fried tortilla strips. Serve with the pico de gallo and a wedge of lime on the side.
APPLEBEE’S MAPLE BUTTER BLONDIE
Improved Hack
Active Prep: 35 min.
Inactive Prep: 22 min.
Difficulty: Medium
Yield: 8 servings
This dessert, which used to be called the “White Chocolate & Walnut Blondie,” has been through a few minor ingredient changes along with the name. The fantastic maple cream cheese sauce has been improved and delicious glazed pecans are now sprinkled over the top where there used to be super boring unglazed walnut pieces. I’ve improved every part of this recipe to more closely match the current version of the top-selling dessert at the huge casual chain. The original is served in a piping hot cast-iron skillet, which you can duplicate by preheating small pans on your stovetop. If you don’t have small skillets, you can serve the dessert on a plate after warming up the blondie in your microwave. Done and done.
BLONDIE
1 cup (packed) light brown sugar
⅓ cup unsalted butter, softened
3 large eggs
2 teaspoons vanilla extract
9 ounces (1¾ cups) all-purpose flour
1½ teaspoons baking powder
¾ teaspoon salt
⅓ cup water
1 cup chopped walnuts
6 ounces white chocolate, chopped into chunks
GLAZED PECANS
2 tablespoons unsalted butter
¼ cup (packed) light brown sugar
2 tablespoons water
1 cup chopped pecans
MAPLE CREAM CHEESE SAUCE
8 ounces (1 cup) cream cheese, softened
4 ounces (1 cup) powdered sugar
2 tablespoons maple syrup
2 tablespoons unsalted butter, softened
¼ teaspoon salt
8 scoops of vanilla ice cream
Preheat the oven to 350 degrees F.
Combine the brown sugar with the butter, eggs, and vanilla in a large bowl. Beat well with an electric mixer on high speed until creamy.
Combine the flour, baking powder, and salt in a medium bowl. Pour the dry mixture into the wet mixture along with the water and mix well with your mixer on low speed until combined. Add the walnuts and white chocolate and mix by hand. Spread the mixture into a 9 x 13-inch baking pan that has been lined with a sling of aluminum foil or parchment paper (to help remove the blondie once baked). Bake for 22 to 26 minutes or until the top has browned. Remove from the oven and cool. When cool, slice the blondie lengthwise across the middle, then slice down three times, creating 8 even portions.
Make the glazed pecans by melting the butter in a medium saucepan over medium heat. Add the brown sugar and water and heat until bubbling. Add the pecans and continue stirring for 2 to 3 minutes or until the water has cooked away. Remove the pan from the heat and continue stirring until the sugar crystallizes on the nuts. Pour the nuts out onto a plate to cool.
Make the maple cream cheese sauce by combining all of the ingredients in a microwave-safe medium bowl with an electric mixer on medium speed until smooth. Heat up the sauce by zapping it in the microwave oven for 30 to 60 seconds on high until warm.
Serve the dessert by heating up a small cast-iron skillet over medium heat for 3 to 4 minutes or until hot. Place one slice of the blondie into the pan, then spoon a scoop of ice cream on top. Pour the warm maple cream cheese sauce over the ice cream and sprinkle the dessert with about 2 tablespoons of the sugared pecans. You can also serve the dessert on a plate by heating up the blondie in the microwave for 20 to 30 seconds until warm, then topping the blondie with a scoop of ice cream, warm maple sauce, and nuts.
ARBY’S CURLY FRIES
First-Time Hack
Active Prep: 25 min.
Inactive Prep: 2 hrs. 30 min.
Difficulty: Medium
Yield: 2 servings
According to recent polls, these fries are considered either the #1 or #2 best fast-food fries in America—they flip-flop with McDonald’s for the top spot (which I call ”Lord of the Fries”). Much of what I know about how Arby’s makes these fries comes from an episode of Food Network’s Unwrapped that reveals what the potatoes go through during the automated prep process at a ConAgra Foods processing plant in Southern Washington. The potatoes are sliced at high speed, then they rush down a conveyor where they are blanched in hot water for 20 minutes to deactivate an enzyme in the potatoes that turns them brown and to help create the perfect texture when the potatoes are fried. The potatoes are then battered, par-fried for 30 seconds, frozen, and shipped to each Arby’s restaurant where the cooking process is completed with a final frying step.
My process at home is simple and incorporates all these steps, but you will need to get yourself a curly fry slicer if you want fries that look just like those at Arby’s. The one I used here from Progressive makes perfect slices and costs around 30 bucks. If you don’t want to pony up for a slicer, you can also use this recipe with fries that are sliced on a mandoline or by hand. They won’t be curly, but they’ll still have the same amazing flavor and crispiness.
1 medium russet potato
6 to 12 cups vegetable oil
BATTER
3½ ounces (⅔ cup) all-purpose flour
2½ tablespoons paprika
1¼ teaspoons salt
¾ teaspoon garlic powder
¾ teaspoon onion powder
¾ teaspoon ground cayenne pepper
½ teaspoon ground black pepper
1 cup water
Cut off both ends of the potato, then slice the potato in a spiral curly fry slicer.
Remove the odd-shape little bits of potato and the slices that are too thin with the skin on them. Drop the rest into a large bowl and cover with water as hot as you can get it from your tap. Let the potato slices sit in the water for 20 minutes, then strain.
While the potato soaks in the water, preheat the oil in a deep fryer or a large saucepan with a thermometer attached to 375 degrees F.
Make the batter by whisking together the dry ingredients in a large bowl, then whisk in the water until smooth.
Drop the sliced potatoes into the batter and gently coat all of the pieces. Arrange the coated fries on a rack or screen so that the excess batter can drip off.
When the oil is hot, par-fry the fries for 30 seconds in batches, then freeze them for at least 2 hours. You can keep the fries for several days in a sealed container in the freezer at this point and finish the frying later, or go ahead and fry them now.
When you are ready to finish the fries, preheat the oil to 350 degrees F. Fry the fries for 2½ to 3 minutes or until crispy. Remove to a rack or paper towel–lined plate and lightly salt the fries. Serve them right away.
AUNTIE ANNE’S PRETZELS
Improved Hack
Active Prep: 30 min.
Inactive Prep: 2 hrs. 10 min.
Difficulty: Medium
Yield: 6 pretzels
Even though dough is usually made up of just a handful of ingredients, knocking off the exact texture and taste of a well-known doughy product such as this is one of trickiest tasks in food hacking. Each small variation in the formula has a profound effect on the workability of the dough and the eventual texture of the bite. What kind of flour and yeast should be used? How long to knead the dough? Should the dough rise at room temperature, or in the refrigerator, and for how long? These are just a few of the many questions that must be answered to achieve a perfect clone, and in the weeks that I spent making this recipe over and over, I have come to some far-tastier conclusions than in my first hack of this recipe.
Among the many changes are the addition of some bread flour to add more chewiness to the pretzel, and brown sugar to contribute a slight molasses flavor that was missing from my previous version. The baking soda bath formula here gives the pretzel a better color, the cooking temp has been adjusted, and the cinnamon sugar has now been perfected. Put it all together, with several other tweaks, and you will now produce some of the best homemade pretzels you’ll ever eat. If you want to make your pretzels as authentic as they can be, snag some real pretzel salt online or in a specialty store. It makes a much better finished product than the kosher salt I mention as an alternative. The recipe here makes original salted pretzels and the popular cinnamon sugar pretzels just like those from Auntie Anne’s.
DOUGH
6 tablespoons dark brown sugar
1¼ cups warm water (105 to 110 degrees F)
¼ teaspoon rapid-rise yeast
12 ounces (2¼ cups plus 2 tablespoons) all-purpose flour
5 ounces (1 cup) bread flour
1 teaspoon salt
BATH
½ cup baking soda
3 cups water
Pretzel salt (or kosher salt)
½ cup (1 stick) unsalted butter, melted
CINNAMON SUGAR
1 cup granulated sugar
2 teaspoons ground cinnamon
Dissolve the brown sugar in the warm water. Add the yeast and mix until dissolved.
In a separate large bowl combine the flours and salt. Pour in the yeast/sugar mixture and mix with a stand mixer on low until the dough forms a ball, or combine with a mixing spoon, then use your hands to bring the dough together into a ball. Knead with a stand mixer or by hand for 5 minutes, then cover the dough in a bowl with a towel for 2 hours.
After 2 hours, preheat the oven to 450 degrees F, and make the bath by stirring the baking soda into the water in a medium bowl.
Spray a little nonstick cooking spray onto a smooth rolling surface. Place the dough there and then divide it into 6 portions that weigh 4½ ounces each.
Working with one portion of dough at a time, roll the dough into a rope that is approximately 36 inches long. Bring both ends up to form a “U,” then twist the ends all the way around once and press the ends (the “feet”) down onto the bottom of the pretzel.
Hold the pretzel where the feet are attached and dip it into the water bath, then blot the bottom briefly on a towel to remove the excess liquid. Place the pretzel onto a parchment paper–lined baking sheet and sprinkle with pretzel salt, unless you are making cinnamon-sugar pretzels. Repeat with the remaining pretzels.
Bake the pretzels for 5 minutes, then rotate the pan and bake for 5 to 7 more minutes or until nicely browned.
When the pretzels come out of the oven, transfer them to a plate or a screen and brush them with the melted butter. Sprinkle a little more salt onto the salted pretzels.
If you are making the cinnamon-sugar pretzels, combine the sugar and cinnamon in a medium bowl and spoon the cinnamon-sugar over the buttered (but not salted) pretzels until well-coated on both sides.
BEN & JERRY’S CHOCOLATE CHIP COOKIE DOUGH ICE CREAM
First-Time Hack
Active Prep: 30 min.
Inactive Prep: 2 hrs. 30 min.
Difficulty: Medium
Yield: 5 cups
Chocolate Chip Cookie Dough ranks in the top five biggest sellers from the famous Vermont duo’s wide assortment of eclectic chunky ice cream flavors. No surprise there really. It’s a simple combination of vanilla ice cream, chocolate bits, and little chunks of delicious cookie dough that appeals to just about everyone with a mouth. But before I could even think about how to make the cookie dough and semisweet chocolate bits for this clone, I had to figure out how to make a creamy vanilla ice cream base that tastes just like Ben & Jerry’s.
Part of the secret is in finding a way to keep the ice cream creamy and to delay melting so that it doesn’t form unpleasant ice crystals when it refreezes. The way to do that is to add in some of the same thickening agents found in the original. These natural gums help to stabilize the ice cream, delaying any ice crystal formation. But where do we get the food gums we need? We’ll just add a little fat-free half-and-half and Egg Beaters to the mix! These products contain the important ingredients needed to make super creamy ice cream with no crunchy ice crystals, just like the pros do. We’ll also use the Egg Beaters in the cookie dough since the dough is not cooked and Egg Beaters are made from pasteurized egg that is safe to eat raw. Just before you scoop the ice cream out of your ice cream maker (yes, you will need an ice cream machine for this recipe), you mix in the little cookie dough chunks and the chocolate bits and get it into the freezer as quickly as possible to set up.
ICE CREAM
2 cups heavy cream
1¼ cups fat-free milk
½ cup fat-free half-and-half
½ cup granulated sugar
¼ teaspoon salt
2 large egg yolks
3 tablespoons Egg Beaters (original)
1½ teaspoons vanilla extract
COOKIE DOUGH
3 tablespoons unsalted butter, softened
2 tablespoons granulated sugar
2 tablespoons dark brown sugar
1 tablespoon Egg Beaters (original)
¼ teaspoon vanilla extract
⅛ teaspoon salt
2 ounces (6 tablespoons) all-purpose flour
2 tablespoons semisweet mini chocolate chips, chopped
CHOCOLATE CHUNKS
¼ cup semisweet mini chocolate chips
YOU WILL ALSO NEED
Ice cream maker
Combine the cream, milk, half-and-half, ¼ cup sugar, and salt in a 2- or 3-quart saucepan over medium heat. Stir often as the mixture heats until it begins to steam, 5 to 7 minutes.
While the cream mixture heats, combine the egg yolks, Egg Beaters, and remaining ¼ cup sugar in a medium bowl with an electric mixer on high speed for 1 minute or until the mixture turns light yellow.
When the cream mixture is hot, pour a little into the bowl with the egg yolks while mixing to temper it (so you don’t cook the yolks). Continue mixing while adding a little more of the hot cream mixture, and then add a little more while still mixing. Now that the mixture has been tempered you can safely add the remaining hot mixture into the egg yolks. Mix well and then pour the entire contents of the bowl back into the saucepan and put it back over medium heat.
Heat the ice cream base while stirring often until it begins to bubble and steam, 4 to 6 minutes. Turn off the heat and add the vanilla extract. Pour the ice cream base into a bowl or storage container, cover it, and place it in your freezer for 2 hours.
While the ice cream base chills, make the chocolate chip cookie dough by combining the butter, sugars, Egg Beaters, vanilla, and salt in a medium bowl with an electric mixer. Mix for about 1 minute. Add the flour and mix just until combined. Before adding the 2 tablespoons of mini chocolate chips, be sure you have chopped them up into smaller bits (about the size of rice) with a knife. Mix in the chopped mini chips.
Form the dough into marble-size balls with your hands, then press the balls slightly flatter into disks. Place all of the dough chunks into a container and into the freezer.
Heat up the ¼ cup of semisweet mini chips in a small glass or ceramic bowl in your microwave for 30 seconds. Stir gently until the chocolate is smooth. Spoon the chocolate out onto a wax paper–covered baking sheet. Place another piece of wax paper over the top of the chocolate, then press another smaller baking sheet down onto the chocolate to flatten it out to about 1/16 inch. Place the pans with the chocolate between them into your freezer to set up.
When the ice cream base has cooled for a couple hours, it’s time to make the ice cream. Place a medium glass or ceramic bowl in your freezer, then pour the ice cream base into your ice cream maker and turn it on. When the ice cream is done, stop the machine and remove the paddle. Break the flattened semisweet chocolate into chunks and drop it along with the cookie dough chunks into the ice cream and quickly mix it up.
Spoon the ice cream into the frozen bowl you had placed in the freezer. Press a piece of plastic wrap down onto the surface of the ice cream (to keep the air out and ice crystals from forming), cover the bowl, and freeze.
BOSTON MARKET MEATLOAF
Improved Hack
Active Prep: 10 min.
Inactive Prep: 55 min.
Difficulty: Easy
Yield: 4 servings
Boston Market has one of the best home-style meatloaf recipes around and it’s one of the most popular recipes I’ve cloned. When I first hacked it I cloned the chain’s hickory ketchup by mixing barbecue sauce and sugar with tomato sauce. It was a good solution, but I recently discovered that the sauce could be even better with just a few additional ingredients that makes it more like ketchup made from scratch. I also determined that the recipe should yield more sauce so that you have extra for pouring over the top of the meatloaf when it’s served.
A few other important tweaks here include adding ground pork and an egg into the mix with the ground sirloin for a richer meatloaf, plus using bread crumbs (as Boston Market does) rather than just flour in the mix for a much better, toastier flavor. Throw it all into a small loaf pan (8 x 4-inch) and in under an hour you’ll be ready to serve up this new improved Boston Market Meatloaf hack.
HICKORY KETCHUP
1 15-ounce can (1½ cups) tomato sauce
3 tablespoons Kraft original barbecue sauce
½ teaspoon white vinegar
⅛ teaspoon salt
⅛ teaspoon garlic powder
⅛ teaspoon onion powder
MEATLOAF
1¼ pounds ground sirloin
½ pound ground pork
½ cup plain bread crumbs
1 large egg
1 tablespoon minced dry onion
½ teaspoon salt
¼ teaspoon garlic powder
Related Subjects
Customer Reviews
Explore More Items
")

")
")


")
")


")
")
