
5
1


101 Harley-Davidson Twin Cam Performance Projects
256
by Mark Zimmerman, Jeff Hackett (Photographer), Mark Zimmerman (With)
Mark Zimmerman


101 Harley-Davidson Twin Cam Performance Projects
256
by Mark Zimmerman, Jeff Hackett (Photographer), Mark Zimmerman (With)
Mark Zimmerman
Paperback(First)
$39.99
-
PICK UP IN STORECheck Availability at Nearby Stores
Available within 2 business hours
Related collections and offers
39.99
In Stock
Overview
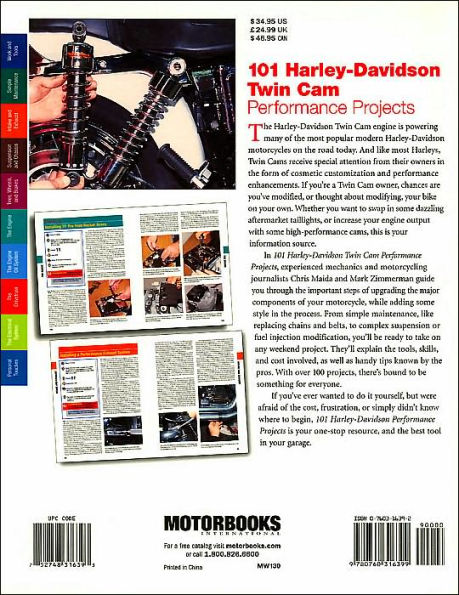
If you're looking for ways to keep up with the pack - or blow right past them - this book has 101 of them. Boost the performance of your Harley-Davidson's Twin-Cam engine with 101 projects broken out by each specific aspect of the motorcycle, including engine, suspension, transmission, exhaust, brakes, and body. Hundreds of photos and diagrams take you step-by-step through each project making it a breeze to keep other riders in your rearview mirror.

Product Details
| ISBN-13: | 9780760316399 |
|---|---|
| Publisher: | Motorbooks |
| Publication date: | 02/01/2005 |
| Series: | Motorbooks Workshop Series |
| Edition description: | First |
| Pages: | 256 |
| Product dimensions: | 8.25(w) x 10.75(h) x 0.70(d) |
About the Author
Mark Zimmerman is the Technical Editor of Motorcycle Cruiser magazine, and a contributor to Classic Bike Guide magazine. He lives in Danbury, Connecticut. Jeff Hackett has been photographing motorcycles for magazines, books, and calendars for 19 years. He lives outside New Haven, Connecticut.
Table of Contents
| Preface and Acknowledgments | 7 | |
| Section 1 | Work and Tools | 8 |
| Prep 1 | The Work Area | 9 |
| Prep 2 | Work Practices | 10 |
| Prep 3 | Tools | 12 |
| Section 2 | Simple Maintenance | 17 |
| Project 1 | VINs and Engine Case Numbers | 18 |
| Project 2 | Performing the 10,000-Mile Service | 21 |
| Project 3 | Lubricating Cables | 23 |
| Project 4 | Changing the Engine Oil and Filter | 25 |
| Project 5 | Changing Transmission and Primary Oil | 27 |
| Project 6 | Servicing the Air Cleaner | 29 |
| Project 7 | Choosing, Reading, and Replacing Spark Plugs | 30 |
| Project 8 | Inspecting and Adjusting the Rear-Drive Belt | 33 |
| Project 9 | Checking and Adjusting the Primary Chain | 35 |
| Project 10 | Replacing Brake Pads | 37 |
| Project 11 | Adjusting the Clutch | 39 |
| Section 3 | Intake and Exhaust | 41 |
| Project 12 | Installing a Screamin' Eagle Air Cleaner | 42 |
| Project 13 | Installing an S&S Air Cleaner | 44 |
| Project 14 | Rejetting the Stock CV Carb | 46 |
| Project 15 | Installing a Dynojet Thunderslide Kit | 49 |
| Project 16 | Installing an S&S Super E/G Carburetor | 52 |
| Project 17 | Installing a Performance Intake Manifold | 55 |
| Project 18 | Replacing the OEM Vacuum-Operated Petcock | 57 |
| Project 19 | Understanding the Twin Cam EFI System | 59 |
| Project 20 | Installing a Screamin' Eagle EFI Race Tuner | 62 |
| Project 21 | Installing and Adjusting the Power Commander IIIr | 65 |
| Project 22 | Installing a Performance Exhaust System | 68 |
| Section 4 | Suspension and Chassis | 72 |
| Project 23 | How to Fix Clunking Forks | 73 |
| Project 24 | Installing a Cartridge Fork Emulator | 75 |
| Project 25 | Lowering Front Forks | 78 |
| Project 26 | Installing New Fork Springs | 81 |
| Project 27 | Swapping the Shock on a Springer | 83 |
| Project 28 | Adjusting Front and Rear Preload (Sag) | 85 |
| Project 29 | Lowering the Rear of a Softail and Installing New Rear Shocks | 87 |
| Project 30 | Lowering a Twin Shock Rear End | 89 |
| Project 31 | Servicing Rubber Engine Transmission Mounts | 91 |
| Project 32 | Installing Rear Air Shocks | 92 |
| Section 5 | Tires, Wheels, and Brakes | 94 |
| Project 33 | Balancing Wheels | 95 |
| Project 34 | Building and Maintaining Wire Wheels | 97 |
| Project 35 | Servicing the Brakes-Changing the Brake Fluid | 100 |
| Project 36 | Installing Braided Brake Lines | 102 |
| Project 37 | Upgrading Your Brake Discs | 105 |
| Project 38 | Upgrading Calipers | 107 |
| Project 39 | Changing Wheels | 109 |
| Project 40 | Checking and Replacing Wheel Bearings | 112 |
| Section 6 | The Engine | 113 |
| Project 41 | Breaking in a New Engine | 114 |
| Project 42 | Dyno Tuning an Engine | 116 |
| Project 43 | Installing Adjustable Pushrods | 119 |
| Project 44 | Installing Custom Lifter Covers | 121 |
| Project 45 | Installing Roller Rocker Arms | 123 |
| Project 46 | Installing High-Performance Valve Springs | 125 |
| Project 47 | Installing TP Pro-Vent Rocker Boxes | 128 |
| Project 48 | Installing High-Performance Heads | 130 |
| Project 49 | Checking Combustion Chamber Size | 133 |
| Project 50 | Claying High-Compression Pistons | 136 |
| Project 51 | Installing a 95-Cubic-Inch Kit | 140 |
| Project 52 | Installing a Custom Cam Cover | 143 |
| Project 53 | Installing an Andrews Camshaft Sprocket | 145 |
| Project 54 | Replacing the Rear Camshaft Ball Bearing | 147 |
| Project 55 | Replacing the Inner Camshaft Bearings | 150 |
| Project 56 | Installing High-Performance Cams | 152 |
| Project 57 | Installing S&S Gear-Driven Cams | 156 |
| Project 58 | Installing a Delkron Camshaft Support Plate | 159 |
| Project 59 | Blueprinting the Engine | 161 |
| Project 60 | Balancing the Engine | 163 |
| Project 61 | Installing a Stroker Kit | 165 |
| Project 62 | Servicing the Breather Assembly | 169 |
| Section 7 | The Engine Oil System | 172 |
| Project 63 | Installing an Oil Cooler | 173 |
| Project 64 | Installing an S&S Crankcase Breather Valve | 175 |
| Project 65 | Aligning a Twin Cam Oil Pump | 177 |
| Project 66 | Installing a Feuling Oil Pump | 179 |
| Section 8 | The Drivetrain | 181 |
| Project 67 | Installing a Hydraulic Clutch Actuator | 182 |
| Project 68 | Installing a Rivera Pro Clutch | 184 |
| Project 69 | Installing a Barnett Scorpion Clutch Spring Conversion Kit | 187 |
| Project 70 | Installing a Primary Chain Tensioner | 190 |
| Project 71 | Installing a Balance Masters Kit | 192 |
| Project 72 | Installing a Primary Belt Drive | 194 |
| Project 73 | Installing a Transmission Pulley | 197 |
| Project 74 | Replacing the Drive Belt | 199 |
| Project 75 | Swapping to a Custom Sprocket | 200 |
| Project 76 | Installing a Rear Drive Chain | 201 |
| Project 77 | Installing a Custom Tranny Side Cover | 203 |
| Project 78 | Installing a BAKER Reverse Shifter Assembly | 205 |
| Project 79 | Installing a Six-Speed Gear Set Kit | 208 |
| Section 9 | The Electrical System | 212 |
| Project 80 | Installing Aftermarket Digital Gauges | 213 |
| Project 81 | Choosing High-Performance Ignition Wires | 215 |
| Project 82 | Installing a High-Performance Starter | 216 |
| Project 83 | Maintaining Your Charging System | 217 |
| Project 84 | Installing a Screamin' Eagle Adjustable Map Ignition System | 219 |
| Project 85 | Installing an Aftermarket Ignition | 222 |
| Project 86 | Replacing the Thermometer with an Oil Temperature Gauge | 224 |
| Project 87 | Upgrading the Horn | 225 |
| Project 88 | Troubleshooting the Electrical System | 226 |
| Project 89 | Upgrading Your Headlight | 228 |
| Project 90 | Hiding Wiring in the Handlebar | 229 |
| Section 10 | Personal Touches | 231 |
| Project 91 | Detailing Your Bike | 232 |
| Project 92 | Custom Turn Signals | 234 |
| Project 93 | Swapping Taillights | 236 |
| Project 94 | Fiberglass Repair | 238 |
| Project 95 | A Primer on Paint | 241 |
| Project 96 | Paint Repair | 242 |
| Project 97 | Installing Chrome Handlebar Control Pods | 244 |
| Project 98 | Selecting and Changing Handlebars | 246 |
| Project 99 | Installing Forward Controls | 248 |
| Project 100 | Selecting and Changing Seats | 249 |
| Project 101 | Applying Coatings | 251 |
| Sources | 254 | |
| Index | 255 |
From the B&N Reads Blog
Page 1 of